Showing posts with label Handmade. Show all posts

18 December, 2013

Countdown to Christmas: Garland Wreath Tutorial

I've been making these little wreaths for a couple years now and it just dawned on me to publish this tutorial.  They're super cute, super festive, and super easy!


You'll need:

Wreath form (I used an embroidery hoop, but have had the same success with wire and styrofoam as well)
2 lengths of garland (this took 2-9 foot lengths, so use your best judgement)
assorted wreath sprays, jazzicles and other sparkly things
wire
wire cutters
scissors


1.  Wrap it up. Wind the end of your garland through your form and wire to fasten (if you're using a styrofoam form, wrap the end around once and secure with a pin).  I stayed away from using traditional adhesives because I like to swap out garlands and cut down on waste.  Then, wind the garland around the form, bunching from time to time to achieve the desired look (I like a fluffy wreath, so I bunch quite a bit). Wind the other end through the form to finish (fasten with pins for styrofoam).  You'll be finished when the form is completely hidden from view.


2.  Go Full Glitz.  Lay out your embellishments.  Don't be afraid to try a few things out before you commit.  Design your little heart out.  Once you've come up with something you love, lay it out in the desired position on your wreath.


3.  Pin it down.  Secure to wreath with wire.  Floral wires and other small guage wires are ideal because they are both easy to work with and easy to hide.  I came up with two options I loved so I made sure to make them interchangeable.


4. Enjoy!

See...easy and fabulous! 


22 October, 2012

Tutorial: Candlestick Cake Stands

Finally!! So cute!  Ooh, before I forget, you'll have to excuse the photos.  My camera was being finicky so I had to take my snappies with my phone.  That being said, here we go!


 You will need:
 - candlesticks
-  primer
 - spray paint
 - plates
 - hot glue gun & glue

1. Spray paint those 'sticks!  I've found that wooden or metal candlesticks work best, but just about anything will work.  If I make a set that need to travel, wooden candlesticks are the best bet for me.  A word on spray painting: try to make long, even passes with the spray from 6-10 inches from the object.  This will cut down on bubbling, uneven cover and streaking.  I usually use a primer, because I like my colors to be as bright and true as possible. Make sure to let the 'sticks dry between coats.


2. Prepare your plates! For this particular project, I used plastic plates.  I needed something that looks great, is lightweight and doesn't look overly formal.  Ceramic, china, and glass plates would work just as well, though.  Just make sure the weight of the plate is enough to balance out the weight of the candlestick.  Just common sense, here.  Now, I know I've said this a thousand times but once more couldn't hurt: Consider letting go of your 'matchy-matchy' spirit.  Coordinating colors and patterns will do the trick and give you the sophisticated look you're going for without looking stuffy.

3.  Glue, baby, glue!  After letting the gun warm up a bit, I usually start by putting glue into the hole of my candlestick.  It tends to level out the top of the candlestick while providing a little extra stability.  Once you've filled the center, it's time to create an evenly applied area of glue to which your plate can adhere. Center your pate above the candlestick.  Press your plate onto the glue and hold pressure for about 30 seconds.  This will help set the bond.  Let the glue dry completely before inspecting your work.  Remember to check for and remove pesky hot glue strings. 


  4.  Test it out!  Basically, you want to look for flaws.  Apply some pressure to the edges of your plate to test the glue bond.  Alternate pressure to test for weak spots.  Of course, you'll need to put something on your cake stand to gauge the overall sturdiness.  Once you're satisfied, you can always reheat your gun and use the heated metal tip to smooth out the glue. 

5.  Enjoy!  You've just made something ridiculously cute!  Gather your besties and throw some cute food on those babies.  Show off your handiwork a little bit.


Stay tuned for super cute pics of the stands as they will be featured in my next party design.

Kisses!
E


12 September, 2012

You Asked For It: Beachy Keen

Hey gang!  Several of you have asked for more pictures of Beachy Keen.  Here you go, dolls. Some of our favorite shots from the event!


This is what happens when designers are too busy enjoying themselves to set up every shot.  I love this picture for it's haphazardly "lived in" look.


 I wanted a change from cupcakes or cake pops, so I opted for doughnut holes.  I think they look like little beach balls. 


Daisies!  Such a great touch.


I love this picture!  This is Allison's adorable niece, giving us her stamp of approval.  Pretty stinkin' cute, right? 

Kisses,
E

26 April, 2012

First Look: Citrus Celebration

As you are probably aware, last week we were hard at work on an adorable citrus-themed wedding.  It turned out beautifully and now I find myself too excited to wait until the pictures come back...So, I've decided to give you a little sneaky peeky of the beauty to come!  Here are three of my private images of the event.


A little teaser of the 'guest book' table.  Our clever little Bride purchased the paper flowers and the guest book tree from etsy sellers. (Vendors will be featured in the post to come, don't worry!)


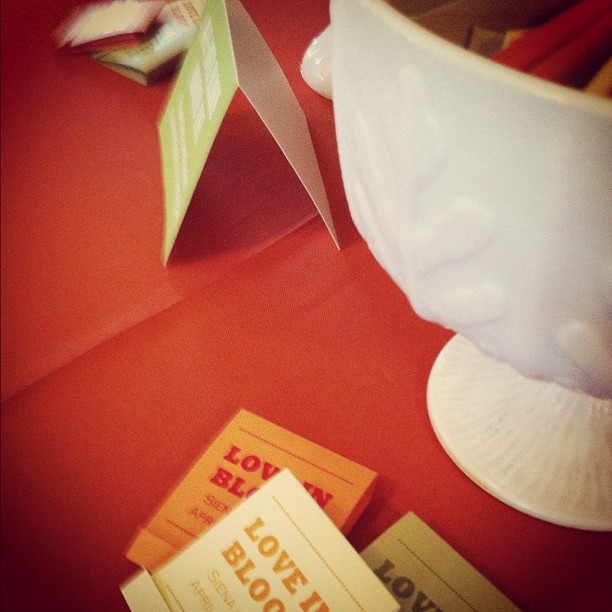
Here you can see just a peek of the favor table.  Our couple chose matchbook seed packets as favors.  I LOVED them.  As you can see, they are super cute and really well designed.  (Again, we'll feature the etsy seller in the full length post about this event)

This is one of my favorite images of the evening.  I'm just so proud of the way this looks.  The lanterns are exactly what I had imagined for this event and I'm so happy we pulled it off so beautifully.  I don't mind saying that the candle effect on the tables is one of my all time favorite effects.  Dim lighting, festive music and hundreds of candles glittering like stars.  Le sigh...the glow...

Well, dolls, I hope that satiates your appetite for Citrus Celebration.  I cannot WAIT to show you the rest of the images.  I think you're going to love it!

15 December, 2011

Holiday Cheer in a Pinch: Paper Chains

Paper chains are some of the most easily recognizable and iconic homemade decorations.  I love them because they remind me of when I was a kid and how much I loved helping my Mom trim the tree and decorate the house for Christmas.  I think this is the perfect holiday craft to do with the littles.  It's fun easy, affordable and safe enough that kidlets can really take the lead.


Materials needed:

-paper
-scissors
-scotch tape (both single and double-sided)

1.  Gather your paper.  Magazines, books, gift wrap, metallics, construction paper, sheet music…don’t be afraid to get creative.  As long as the paper you’re using in your chains is roughly the same weight, feel free to mix it up a little!

2.  Cut paper into strips.  Keep in mind, the size of your strips will determine the size of your links.  I tend to make my strips wide enough to get about 5-6 strips out of an 8.5 x 11 page.  Tip: Consider coordinating colors mixed with pops of metallics for a modern twist.


3.  Tape ends of link together, making sure to interlock links as you go.

4.  Hang with double-sided tape.  Easy peasy.


As you can see, I've added a fun little foil snowflake for a little more zazz.  Feel free to jazz up your own chains!


12 December, 2011

Holiday Cheer in a Pinch: Garland Trees


 With December chugging along, I usually find myself dreaming up ways to shove as much Holiday Cheer into my schedule as possible.  Last year, for instance, Allison and I whipped up a little cookie decorating party.  It was heavenly!  Our design was polished and refined, but the details were quick, easy and affordable. This is the first of two of our favorite décor elements from a little party we like to call: Winter Wonderful


Materials needed:
- three cones of graduating size (I happened to have some floral cones floating about my house, so that’s what I’m using here.  The same look can be achieved with any cone shaped item. )
- a few lengths of garland…9-12 feet should cover it, depending on the size of your cones
-straight pins (if you are using a cone that is impervious to straight pins, you might find the use of double sided tape or fabric glue helpful)
-scissors
-embellishments of a shiny, delightful caliber (optional)

1. Secure the end of one length of garland to the apex of the cone with a straight pin.

2. Wrap the garland around the length of the cone, anchoring garland sporadically with pins.  Try not to wrap too tightly, as we are trying to achieve a fluffier look.


 3.  To finish the bottom of the cone, snip garland to fit and secure with pin.


4. (Optional) At this point, you can embellish your garland trees as much or a little as you like.  Last year, Allison and I used big bird ornaments (that’s right, we put a bird on it) that we found at Michael’s.  To keep your minds fresh, I didn’t add pics of mine, but I suggest buttons, costume jewelry, gift wrap tie-ins…you name it.  The sky is the limit!


24 October, 2011

You Asked For It: Horror-ween


 G:
I am throwing a Halloween party. I wish to impress my friends with my knowledge of horror movies (although they kind of terrify me).  Do you have any recommendations?

Why, yes.  Yes I do have some opinions.  Although, I cannot tell you how hard it was to narrow down my list.  For instance, I thought I might get started by writing down all the scary movies I've ever seen...well, after about 90 minutes, I was up to about 125.  Then came the categories...oy.


For the purpose of your list, I've chosen twelve of my favorites (regardless of genre) and left (most) of my movie snobiness geekiness commentary out of it.  I will warn you, though.  I'm a fan of originals.  I'd stay away from the remakes...except for Halloween.  Rob Zombie's remakes are sure to scare the pants off your guests.

And away we go:

The Omen (1976.  Trust me.  Skip the 2006 remake.  It's caca.)
Rosemary's Baby (1968-Mia Farrow at her finest)
Friday the 13th (1980.  Again, skip the remake.)
Nightmare on Elm Street (1984...Johnny Depp is totally in it.)
The Exorcism of Emily Rose (2005 Superb movie.  I was totally terrified after this came out)
The Shining (1980)
Night of the Living Dead (1968- I am a HUGE Romero fan and a zombie purist.  This film started it all, by the way)
Children of the Corn (1984)
The Exorcist (1973. "Your mother sucks ** in hell!"-Classic.)
Halloween (really, either the original or the Zombie remake-both are outstanding)
Sleepaway Camp (1983)
High Tension (2003 I'd watch it with the subtitles if I were you, it loses a lot in dubbing)

And a little bonus (and one of my all-time, fave horror films) number 13.  Has a spooky ring to it, huh?

The Texas Chainsaw Massacre (1974.  It's a classic, I'm tellin' ya.  Totes awesome.  Totes scary.)

Have fun, dolls!

Am I missing anything?  Leave it in the comments!

You Asked For It: Music to Die For


It's so awesome of you to answer all these questions.  And for free?!  Lucky us.  Hey, I've got one: I'm throwing an Halloween get together too.  You always put a big emphasis on engaging the senses.  I need some killer (excuse the pun) music.  Any suggestions?

Thanks for reading!  I love answering reader questions.  Its easily my favorite part of having a blog.  Now! On to your question:


Nothing adds atmosphere to an unforgettable event quite like the perfect playlist.  However choosing music to set the mood can be tricky.  To help get you started, I'm sharing the top 25 tracks on the Goldiluxe Halloween Hit List.  Enjoy if you dare!

Hey There Little Red Riding Hood - Sam the Sham & The Pharoahs
Monster Mash - Bobby "Boris" Pickett

Werewolves of London - Warren Zevon
Purple People Eater - Sheb Wooley
Witchy Woman - Eagles
Love Potion No. 9 - The Clovers
Black Magic - Johnny Mercer
I Put a Spell On You - Screamin' Jay Hawkins
Teeth - Lady Gaga
Walk Like an Egyptian - The Bangles
Subterranean Homesick Alien - Radiohead
Monster - Lady Gaga
Thriller - Michael Jackson
Pyscho Killer - Talking Heads
One Way Ticket to Hell - The Darkness
Paint It Black - The Rolling Stones
Spooky Little Girl - The Zombies
Evil Woman - ELO
Black Moon Rising - CCR
Halloween (Main Theme) - From the Motion Picture
Nightmare on Elm Street (Main Theme) - Moussorgsky (Fantasia Soundtrack)
Ghostbusters - Ray Parker Jr.
Adams Family Theme
Munsters Theme
Firestarter - Prodigy
Beautiful People - Marilyn Manson (yes, I know, but it really is spooky)

There you go, doll!  I hope you can make some of these work.  I love Halloween.

And, for the rest of you, you can leave your questions on Facebook, Twitter or e-mail me at rosieevents@gmail.com.  I'd love to hear from you.

Photo from martha stewart dot com


26 September, 2009

Luxe Life: Adam and Laura

Hey all, here are some pictures from a wedding The Hubbs' and I attended this summer. I hate that it has taken so long for me to get these pictures up here, but I have had the busiest summer of my life! Whew! But, now that it is coming reluctantly to a close, I feel I can release these and chat about them effectively.

Adam and Laura have been friends with The Hubbs for years and a couple for even longer. I had the pleasure of meeting them at a party they were hosting. I really have enjoyed getting to know them over the last couple years.

The cute couple opted for a semi-formal affair at Olbrich Botanical Gardens. I got so excited about the place (that and the lighting at the reception took a toll on my photo quality) that I forgot to take a lot of pictures of aspects of the reception. Had I designed this wedding, I would have more detail...


The approach! I was in love with this place from the start. Look at the wonderful little house at the end of the road.

The Pavilion! I am such a big fan of this place. Of course, I am a big fan of anything shiny! I was not expecting this at all. A very stylish surprise.


The cutest flower girl ever! Ever. She was enthralled with the Bride and Groom in all their finery. I remember being that age and wanting to be part of the action. On a critique-y note, I am not always a fan of these big, tulle princess gowns for little ones, but this one was done very nicely. The length definitely added a little formality to the dress and her overall look! What a little doll!

The happy couple getting a few last minute directions. I was surprised this all went as well as it did without a Day-Of Coordinator. I really recommend it, Brides. The last thing you want to be doing is giving/getting directions when you could be off enjoying the day. P.S. LOVING the dress. Such a beautiful neckline. The pearls were such a simple yet elegant touch to an already gorgeous Bride!

The table. I like the napkin fans...I usually don't like fancy napkin sculptures, but these are cute and add a lot of pizazz to the table. I really like the use of foliage instead of traditional flowers. A really good example of creating style on a budget.

The cake! A very distinct choice with the pillars. I'm loving the sugar flower spirals. Cute cute cute!

Well, there you have it. I have sooo many more, but these were some of the highlights. I also wish I could've gotten my hands on the professional shots for this one. Overall, this was one dreamy outdoor wedding!

The photos shown do not represent Darling Events design.

28 July, 2009

Swoon! Check out the etsy shop here for full details!


photo credit: Joan Shum


20 July, 2009

Summer Wedding Favor Idea {So Cute I Want to Scream Edition}

I just gained a new follower on Twitter: Tie That Binds Weddings. Mekala Tennin, the brains and lead designer behind this incredible little shop gives us exquisite designs at affordable prices. Which is, let's face it something we can all appreciate, regardless of budget. I just wanted to share this:


I love it! It's stylish, clever and unique. Three of my favorite things! The best part?! It is downloadable! For $10 Tie That Binds will customize and give you the .pdf. You can download with as may reprints as you need. Go here for full details. I love clever favor tags and I love unique favors even more. This season I'm especially fond of seed packets, seedlings and plantable paper notes.

I will find out where this brilliant business is located (and swiftly too, I hope she's close for those of you who support regional business) and post updates. But until then, go here for the smartly designed website, here for the etsy shop (complete with a full product line) and here to follow on Twitter. Trust me, you won't be disappointed!

07 June, 2009

Etsy Love: Part Two


Hey all! I thought I'd sneak in another installment of Etsy Love! This time, I thought I'd put together a little something for the Bridesmaids. The number one complaint I get is, "I hate spending all that money for a dress I'll never wear again!" So, here are a few things I found to hopefully give all you Brides out there a little inspiration.

1. This dress is one of the prettiest ones I've seen in awhile. First of all, I love this color. Pink can make me a little crazy sometimes, but this is a good shade. The Mayflower Dress is by sarahseven. Based in Portland, Oregon sarahseven makes beautiful clothes at affordable prices. The Mayflower Dress will cost you a sensible $198.00. The dress is made from pink cotton jersey with a flower at the bust. Note the flattering pleated waist. The hem of the dress sits just above the knee (perfect length for a bridesmaid's dress, if you ask me) but can be hemmed to specifics. This clever lady also creates custom dresses in an array of colors. Visit her shop for details and full list of policies.

2. This is a comb adorned with clay flowers straight from Pheonix-based seller, debashri. Selling for $65, you will get hand crafted clay flowers (I counted 3 gardenias in full bloom and smaller stephanotis flowers) fastened securely onto a metal comb, with a silver finish. I really enjoy the Sworovski rhinestone and pearl embellishments-I fell like it adds the perfect amount of sparkle without being promish. This seller has a 7 day turnaround. Debashri also crafts custom combs, bouquets and centerpieces as well. Please contact the seller for details.

3. These Ribbon Rose appliques are from Etsy seller, Rose Garden Stitches. Shown here, in sable, these roses measure 1", 1 1/4", and 1 3/4". Included with the roses are green leaves. This seller has several packages of 3 and 6 roses. Available in any size and color, I think these would be perfect to spruce up hairpieces or sashes. Also, perfect for flower girls. The set shown is $5.00. With any seller that will be doing custom work for you, be sure to allow time for shipping. Be as clear as you can when discussing your needs before any payment is sent. Trust me, the extra communication will save both parties in the long run.

4. I love this white knitted wrap! It's sweet, feminine and delicate. This great find is from Lithuania based seller, tijusai. The best part for me is the little flower pin fastener. Made of 70% mohair and 30% acrylic, this crocheted wrap cost $40. The button fastener features a cluster of golden and pearl beads accented with a soft golden fabric. This package will arrive airmail in a registered package. Shipping time to the US is at least 2-3 weeks. and will cost you $8. What a steal!

5. This fun little handbag is a favorite item of mine. I found it on London seller, Emma Gordon's shop. All of her handbags are stylishly designed and well crafted. The "Georgia" (shown here in silver) measures 27cm w x 12cm h and will run you $65. The main body is lined in cotton. I love the stripes! The bag itself is silver satin decorated with a peach satin rose. Emma Gordon ships all handbags tissue wrapped and placed in a box. These products ship from the UK and will take awhile to get to you so be sure to leave enough time (I hate to sound like a broken record, but it is important). Contact the seller for custom orders (she makes clutches, totes and shoulder bags too and they are just as delicious!) and special pricing for more than four bags. Matching headbands are available, as well.

Enjoy! Feel free to the sellers with questions about their product lines and shop policies, they'll be happy to help!

Remember, the photos belong to the sellers to which they are associated. Please, lets not copy. It's not nice.

04 June, 2009

Tips For a 10K Wedding

As many of you know, The Hubbs and I tied the knot this February. On the 27th to be exact. Lately, I have been reflecting on our nuptial celebration as I help a friend with the details of hers. It was perfect! We got everything we wanted, we didn't have to grapple with other couples for the good stuff and we had the benefit of a lot of custom touches that really put our stamp on the day. The best part was, we didn't break the bank doing it. But what if it hadn't been that way? Could we have done it for, say, $10,000 and been happy with it? The answer friends, is "Of course we could have!" And here's how......

Stationery: $500
How to Save: DIY is always the way to go for me when trying to save money. Handmade invites are a perfect way to introduce your wedding to your guests. I find that people really do appreciate the fine details and the time you put in. Also, DIY invites are the only way to ensure you get exactly want you want-without having to compromise on style. Another way to go is to do an online search for small stationery companies and designers. Most are very well designed and completely affordable. The time you'll save on assembly and printing will be immeasurable as you move forward.

Where to Go:
I found a number of downloadable invite suites on the Paper Source website. I found an offset-print suite for $345 (for 75 sets that include invite, reply card, reception card and envelopes for both). With a clever little folded note (think thank you notes) the total comes to $453. Figure a bit more for shipping and postage and your still under $500.

Ceremony: $250
How to Save: If you are a church-goer, you probably have this covered. My number one money saving ceremony tip is to plan a short, sweet ceremony at a local park. Let the natural surroundings be your decor. Invite your guests to stand around you in a semi-circle while you exchange vows. It should be a short ceremony mind you, only 15-20 minutes, but ask the guests to give a personal blessing to you and your SO for the start of your new life together. Beautiful! Just make sure you can use your reception space as a backup in case of inclement weather. Go to the County Clerk's office for your license and have a friend officiate.

Where to Go: Park Permits for a Milwaukee Municipal Park will be around $150 (for 100 people in a designated picnic area). Get your marriage license for $100 and have a friend ordained online at themonastery.org.

Ceremony Flowers: $250
How to Save: This is a bit more difficult, for sure, but it gives you and your SO the chance to really get creative! If you need flowers, stick with the most important aspects (perhaps, the bridal bouquet...). You may want to consider having the bridesmaids carry a single flower (think Lillies or the stately Bird of Paradise). Several florists are more than happy to design ala carte. You can go online and search for unique alternatives to flowers for the bridal party. I'm a fan of parasols or fans in lieu of traditional bouquets. For the boutonnieres, try something non-conventional, something that fits the theme of your wedding...

Where to Go: Search Esty for the boutonnieres and bridesmaids bouquets. The vendors there are wonderful and often willing to work within your budget and personal tastes. At Wholesale Flowers and supplies, I found a ten branch bunch of dendrobium orchids for $11.60 a bunch- perfect for the bridesmaids as they glide down the aisle. I found a peacock feather boutonniere on Etsy for $8.00 each. For 5 'maids with two stems each and five groomsmen we come to only $51.60. A florist here in Milwaukee can make a bridal bouquet for $75.00 to $100.00, figure in shipping and your right under the money!

Photography: $500
How to Save: Okay, this is an important one. The easiest way is to find a photographer who will do some ala carte services. This usually means you won't pay for things like re-touching editing or photo albums. I really recommend this route though if you or someone you know is a photo editing whiz. Then, this works out really well. But I will caution you, this can really backfire if you aren't careful. Another idea is asking an especially talented friend to barter. For an alternative idea, try placing disposable cameras on all the tables at the reception and let them do the work for you!

Where to Go:

Several disposable cameras sell online for $1.75-2.50. Some disposable digital cameras sell for $9.99. With two cameras per table on 20 tables, the grand total is $399.60. Figure in tax, developing and printing and you'll still come in way under the mark!

Attire: $500
How to Save: This is my favorite part! Ok, where to begin...try the bridal collections from places like Target, J. Crew, and Ann Taylor. White House Black Market is THE place to go for chic, white dresses. In addition to that, shop sample sales, browse off the rack and do my favorite thing-buy vintage!! Etsy is another brilliant option for the stylish bride. Just remember to allow enough time for things like shipping time and re-orders.

Where to Go: It's dreamy, playful and sexy. I love this dress from White House. The best part? For me, it's the $158 price tag. Not to be outdone, I found this little ditty on Etsy for $425.

Hair and Makeup: $200
How to Save: Shop around! This will save you A LOT of money! Instead of getting a complete style from the professionals, try a blow out or a fab down-do to for all the drama without the moolah. Then, get your makeup done professionally.

Where to Go: I got my hair done here in Milwaukee at Hairy's Hair Bar for around $75. My stylist was knowledgeable, friendly, and fun! I loved her! My makeup was done by Lindsay Williams. She's unbelievable! I established an instant rapport with her and I felt like she knew my face almost better than I do and she wasn't afraid to tell me when she thought my ideas were a little bit silly. She was gentle with me about my insecurities and I respond really well to that. I barely squeaked by under $200, but I made it...

Videography: $300
How to Save: Although, I am not a big fan of wedding videography, I don't suggest giving it up entirely, if it's something you really want. That said, this might be difficult, but if you shop around I think you'll be able to do it. I suggest negotiating a daytime "ceremony only" package. You might also consider asking a friend to set up a camera for you.
Where to Go: I found a film student who would shoot the ceremony and part of the reception for around $300.

Reception: $5000

Are you ready for my best piece of advice? Forget convention! Please, consider dumping the tried and true Saturday night sit down, huh? Instead how about a chic party at a champagne bar? Or a Friday night soiree? Caterers and reception sites are usually wonderful at working with your budget and getting you what you want.

Where to Go: Milwaukee Champagne Bar Cuvee is the perfect place for a swanky fete at an absolutely mind blowing locale. When The Hubbs and I checked the place out, they offered it to us on a Friday night for just short of $2000. We considered doing heavy hors d oeuvres and we received a quote for $3000. The Astor Hotel gave us the Grand Ballroom on a Friday night for $3000 food and $750 bar. With gratuity and tax, we were right within $5000. A local Milwaukee restaurant on hip Jefferson Street would cater a three course meal with beer, wine and soda for about $60 a person.

Reception Decor: $325

How to Save: One of my favorite reception centerpieces is tea lights and candles on mirror tiles. Try using mis-matched candles of all sizes and heights and arrange them on your tables. Add lose petals at the base of the candles to punch up the romance. Not so much your thing? Try bulk flowers in mis-matched vases from your family and friends. Flowers that are naturally in season during the season of your wedding will be cheaper.

Where to Go: Using the flower website mentioned above, I was able to get bunches of flowers for between $3.95 and $11.60. The greenery bunches were all around $3.95. If you use containers you already have and borrow some from friends, coming in at $325 is a cinch. Candles are so affordable, it's amazing! At quickcandles.com, you can easily find a set of 144 votive candles for $79.99 A set of 72 candles is only $39.99. Bags of loose petals range between $5-10.

Reception Music: $300
How to Save: I really think that this one is hard to do for so little, but you can try. Try to find a DJ that will combine the ceremony and reception. For live music, consider hiring an ensemble from a local college for the ceremony and then hook up your ipod or itunes. Just be sure to have tons of great music and enough variety to get everyone dancing!

Where to Go: I found a string trio willing to play the ceremony for $300. When employing live music, always be certain to hear them live before signing or paying for anything.

Wedding Cake: $225
How to Save: First, scale down the size of your cake. You can order a custom sheet cake from upscale grocery stores or local bakeries for the cake cutting. But, the trends are changing...I love dessert bars! Try cupcakes, tarts, tortes, cookies or assorted candies. Serve the cookies and candies in assorted jars. Use cake stands of varying heights to add some levels.

Where to Go: A bakery here in Milwaukee will sell cupcakes for about $15-18 per dozen. Tarts and cookies will vary by bakery, but if you can, you may want to enlist the help of some of your more Creative friends. One of the more upscale grocery stores has double layer cakes available for $25-40 dollars. All very beautifully decorated to boot! With a cake at $40 and 10 dozen cupcakes at $15 per dozen we come to a grand total of $190. You'd still be able to add other sweets to round out your bar!

Favors: $40
How to Save: I suggest the handmade route, here. The possibilities are endless! If a helpful friend has a killer recipe for your favorite snack, why not make some and bag it for your guests to enjoy? I think recipes are a great way to honor a friend or family member that cannot celebrate with you. My Grandma made these killer anise flavored cookies. I LOVED them all my life. I think I would have made some and then included her recipe. Not a foodie? CD's, saplings and flower seeds are some of my favorite things.

Where to Go: You can get 100 clear favor bags for $15. One hundred recipe cards are available at several kitchen supply stores for around $20. I suggest handwriting the recipe if you can. A handwritten touch is always personal and never goes out of style.

GRAND TOTAL: $8090!!Italic
That leaves $1900 for extras. This will give you the ability to amp up the aspects that you really love! For me, I would add more to the reception music and the photography. But that's just me. Perhaps the best thing to do would be to put that $1900 back in your savings account...

21 April, 2009

Let's Get Funk-y!


My friend Kate is a brilliant photographer. She has a degree in photography from MIAD (Milwaukee Institute of Art and Design). I met her a little over two years ago while we were both working at a certain Milwaukee stationery store.The above photo is one of my absolute favorites. It features the Wisconsin Dells, which I'm told is a tourist location with a lot of water parks. I believe it is a 45 minute drive from Milwaukee. The Hubbs and I are putting this little beauty in our house. But I digress...

So, Kate. Milwaukee resident and friend of mine has a cat. His name is Annoying Customer, or AC for short. AC runs a blog and it's marvelous! This pretty kitty is the subject of several of Kate's creations. She has an extensive line of cards and invitations featuring the little black dynamo.

Anyway, Ms. Funk has just issued her Spring 2009 catalog. You can find it, here. It's super cute! She has several boxed card sets available as well as party invitations. All handmade and all brilliant. The catalog itself is wholesale but I think you can get a good sense of her collection. The products and retail prices are available on her Etsy Shop.

If you're in the Milwaukee area, you may find her products at Fasten Collective on Kinnickinnic Avenue or at Broadway Paper. In Illinois, she can be found at Renegade Handmade. She also has a really great Etsy Shop, which might be the easiest way to satisfy your craving for Kate Funk products.

Please tell your friends, families and neighbors about this great local artist!

Photo credit: "Wisconsin Dells Trio" Kate Funk
In the catalog: layout and graphic design by Brennan Groh, all products by Kate Funk

16 April, 2009

Handmade Bliss!

I'm in love, I'm in love and I don't care who knows it! I've got a lot of deliciousness for you today...invites and feathers and agate, oh my!

1. This beautiful invitation suite comes to us from green quince. The colors are chartreuse and a deep, beautiful burgundy (tres chic!). Everything is flat printed, but you'll find gocco screen printing on the envelopes. The suite shown here is $375 (which includes 100 ea.- invite (5"x7"), an A7 outer envelope complete with return address and a reply card/envelope). All assembly is done by the crafty gal behind green quince. She's completely custom as well, perfect for the choosy Bride. Most of the materials she works with are recycled and she is always on the watch for materials made with 100% Post-Consumer waste. She's located in the Oakland area, check out her Etsy Shop for full details and shop policies. Photo belongs to green quince.

2. This is the Daniella feather fascinator. This is a sweet little creation from Etsy seller, Vie Moderne. Made with ostrich hurl and hen feathers and fastened to a rhinestone button on a recycled leather base. The piece rests securely in your hair with the help of an alligator clip. At $34 (plus shipping), this hairpiece is a steal. This would look great with or without a veil. I also think it would be lovely on the bridesmaids or flower girl. Vie Moderne is located in Pasadena, California. This is her Etsy Shop and needless to say all of her shop policies and procedures can be found there. Photo belongs to Vie Moderne

3. These beautiful Agate Briolette Drink Charms are maybe my favorite item of the day. Tinahdee makes wonderfully beautiful jewelry with an array of materials. These charming little drink charms are made of shined, agate stones and wrapped with copper wire. At $30 (plus shipping, of course) for a set of 4, they might be a bit pricey, but totally worth it. Perfect for bridesmaids' gifts. I also think they'd be nice worked into boutonnieres or bouquets. Go to the Etsy Shop for details! Photo belongs to tinahdee.

4. Next we have the Elizabeth Earrings from Etsy seller, luxe deluxe. Made with genuine Swarovski rhinestones the flower pendants are set into antiqued silver plated filigree. A Swarovski briolette hangs as the focal point on each earring. The Elizabeth earrings are a bargain for only $68.00USD. This is the matching necklace. There are several variations on this particular style and all of them are gorgeous! Check out the double strand Elizabeth Necklace. Beautiful! Get on over to her Etsy Shop! The only thing I will say is prepare to pay a little more in shipping as this shop is located in Edinburgh and all shipping will come from the UK. Photo belongs to luxe deluxe.

5. Next up, we have these charming Charcoal roses from seller Allen Company Inc. Made of silky microfiber fabric and mounted on real vines and branches with silver wire, these roses will run you $150 (plus shipping) for a set of 24. I love these! I think they'd be perfect for any Bride looking to add romantic, vintage accents to a more modern look. Also, a fabric bouquet was just made for preserving......I'm thinking you could fill one of those clear glass lamp bases with them (after removing blooms from stems) or one might put a couple lovely blooms in a chic shadowbox along with other memorabilia from your special day. Ah, beauty. This clever little company is located in eastern Pennsylvania and you can travel to her Etsy Shop for details and policies. P.S.- She takes custom orders! Photo belongs to Allen Company Inc.

6. Finally, something for the guys! These microfiber ties from Detroit based seller Cyberoptix Tie Lab are smart, chic, and a perfect way to add some color to the guys without the all the schmaltz. The Hubbs even likes them! Shown here in the ridiculously Delicious seafoam/rose combo, this set of 4 ties costs just $108. Shockingly inexpensive when you think of what you'd pay for some of the lower quality stuff in the stores. The best part?! They're handmade-which means on top of everything, no one will ever have the exact same thing. Check out other offerings here and here! Oh, and these too.....delish! They are willing to work with you on design and color scheme. Cyberoptix also has several group rates on ties for weddings (love, love LOVE them!). Perfect for the man with style! Go to their shop for details and policies. Photo belongs to Cyberoptix Tie Lab.

Now, for a few "dos and don'ts" that may aid you in your Etsy travels.

Do read the Shop Policies on each seller you visit BEFORE placing any orders. This is important folks, because every seller is different and a "do" in one shop could very well be a big 'ol "don't" in another. Unsure? Ask. Use the convo tool-always. Most sellers will require you use it for consultations on custom work anyway.
Do
establish a working relationship early on. They want to help you, but you've got to meet them half way.
Do
ask all of your questions! Even if you think it might be a stupid one. If you leave something unclear, you may be very sorry later.
Do
be polite at all times, especially when placing a custom order. Be sure to give the seller as much information as you can up front-They are very busy people and are not mind-readers!
Don't
be inflexible. If you are told your idea won't work exactly the way you pictured it, it's because it won't. These people are brilliant designers and artisans, not miracle workers. Believe you me, they know what they're talking about.
Don't expect shipping miracles. Plan in advance your timeline. Give your seller the ideal ship date before placing your order. Ask them if it's possible, beause if it isn't you may need to regroup. You've chosen handmade items for a reason. Don't rush your artisan-they can't bend the space-time continum just because you waited too long to order.
Most importantly, do have fun! Esty is a wonderful place and I haven't met a single inhospitable seller. It's a great experience and you can't believe how good buying handmade can feel!

All photos owned and copyrighted by the corresponding Etsy seller. They are great pictures, I know, but don't reproduce and don't copy. It's not nice! If you must use- please give credit where credit is due. You didn't take those pictures and neither did I.


12 April, 2009

More on Save the Dates!

My last post was a lot of words. Today, I have some pictures for you. Here we go!


This comes to me from my friend Kelly. She and Blake will be married in August. What can I say? I LOVE this. Notice the simple wording- names, dates, and "invitation to follow". That's all you need. The picture is adorable. They look so happy and Kelly looks beautiful in blue. The design is perfect! It's flirty, fun, and I absolutely cannot wait for August 16th. Remember what I said yesterday about leaving your guests wanting more? This is what I meant. I think this is a great example of functionality and artistry. The best part?? She did these herself! That's right, my crafty little friend drew these up in Photoshop. They were printed on high-quality photo paper and sent in a sweet little envelope (Which I don't have for you b/c The Hubbs threw it away). These cards measure 4x6 a standard postal standard, but these could easily be made into postcard size. This would save both paper and postage. I think this is huge for bargain-savvy brides! This shows us that with a little ingenuity and an eye for color and design, we can take control of our weddings and save a little money doing it.


This one is ours. Yep, this is your first glimpse of the Burgess/Ellingen invitation suite. Again, we stuck with the simple wording. Names, dates and "invitation to follow". We went with a big, bold format to really catch the eye of the recipient. I chose a square shape to make it stand out even more from the mail one usually receives. The design is simple but elegant and, I think, accurately gives our guests a taste of what's to come. Our biggest challenge was amping up what can usually be a casual announcement to fit the theme of the formal evening wedding we were having. We also had a lot of out of town guests so these went out in two waves. Out of towners first, then locals.

Our cards were designed by my friend/Bridesmaid Allison. They were thermographed by Paper Envy here in Milwaukee....well rather, Elm Grove (more about Paper Envy as we roll along). These were a little more expensive, but by having our friend design them and buying our deliciously shiny paper in bulk, we really did save quite a lot.

Save the Date cards are necessary. More impotantly, they're exciting! Have fun with them! Announce your wedding with a bang!


08 February, 2009

Unveiled!


This is my ridiculously delicious, hand made veil! I am just in awe of the exquisite handiwork and its overall appeal. This lovely model, in a picture taken by Miss Brenda looks absolutely beautiful! I thought it was wonderful that Brenda wanted me to see her work before she sent it to me.

I searched and searched for a unique veil that would fit my dress, my decor, and my style. This proved to be difficult. First of all, my gown is soft gold, not ivory or white. I also knew I did NOT want a blusher. Ugh. Blushers are beautiful for some brides, just not at all for me. Finally I settled on a birdcage style veil. I've always loved them and they are so undeniably retro I just knew it would be a match made in heaven.

Unfortunately, I soon learned that cage veils in champagne were hard to find. Enter Etsy and the ever so talented Brenda. Her Etsy site is wonderful, everything was beautifully made. After about 10 seconds, I knew I had to have her make mine. Armed with my opinion, pictures of my dress and her super ability; Miss Brenda crafted this little beauty for me in no time. The result as you can see, is flawless. It is so much better than what I had in my head, more than I could have imagined. I am so excited to wear it.

Just another reason why handmade is the absolute BEST way to go. If you are anything like me, you are a strong-willed, detail oriented lady with a whole "master plan" in mind. My ideas have been fairly specific and hard to find. Going with custom made pieces has really been the only way to get the look I wanted. I am so lucky to have found such talented artisans to bring my vision to light.

Your tip? Surround yourself with talented vendors whom you feel comfortable. Make sure they can work well with you and can properly execute your vision. Try to find people you like as people too. Compatibility is an asset in any relationship. You may have to search for the perfect team a little longer than the next gal, but it will be well worth it.